Monthly Archives: June 2014
Finishing Course 2!
I can’t believe that this was the last class for course 2! The weeks go by so fast and I’m impressed by how much I’ve learned in 8 weeks. Like the last class for course 1, we had to bring in a frosted cake for decorating. But first, a couple simple things before decorating. Thankfully, we went back to buttercream frosting.. you definitely don’t use royal icing to frost a cake!
First, we learned the reverse shell border. Using star tip#21, you start a shell like before, except you circle around the starting point to create a swirl shell. It was simple and looked pretty cool! I think this might become my favorite border!

Then we learned the basketweave pattern. I’ve used this before for pie crusts, but it was a whole different ball game with frosting. To start, we used the same star tip#21 and drew a vertical line. Then we made a horizontal line across the vertical line and put dots underneath to keep the spacing right. Then another vertical line over the edges and dots, with alternating horizontal line. The overall effect was really awesome!


In fact, I liked it so much.. that I decided to use it on my cake! I used my flat spatula as a spacing guide and marked my cake with lines using a toothpick. I was lucky that my spaces around the cake ended up an even number, otherwise I would have had to erase two lines and even it out. The key to making this straight was to have the cake at eye level. It took me 45 minutes to work my way around the cake, but it was worth it. I added a few royal frosting roses and buttercream leaves to finish it off and I really liked how it turned out!


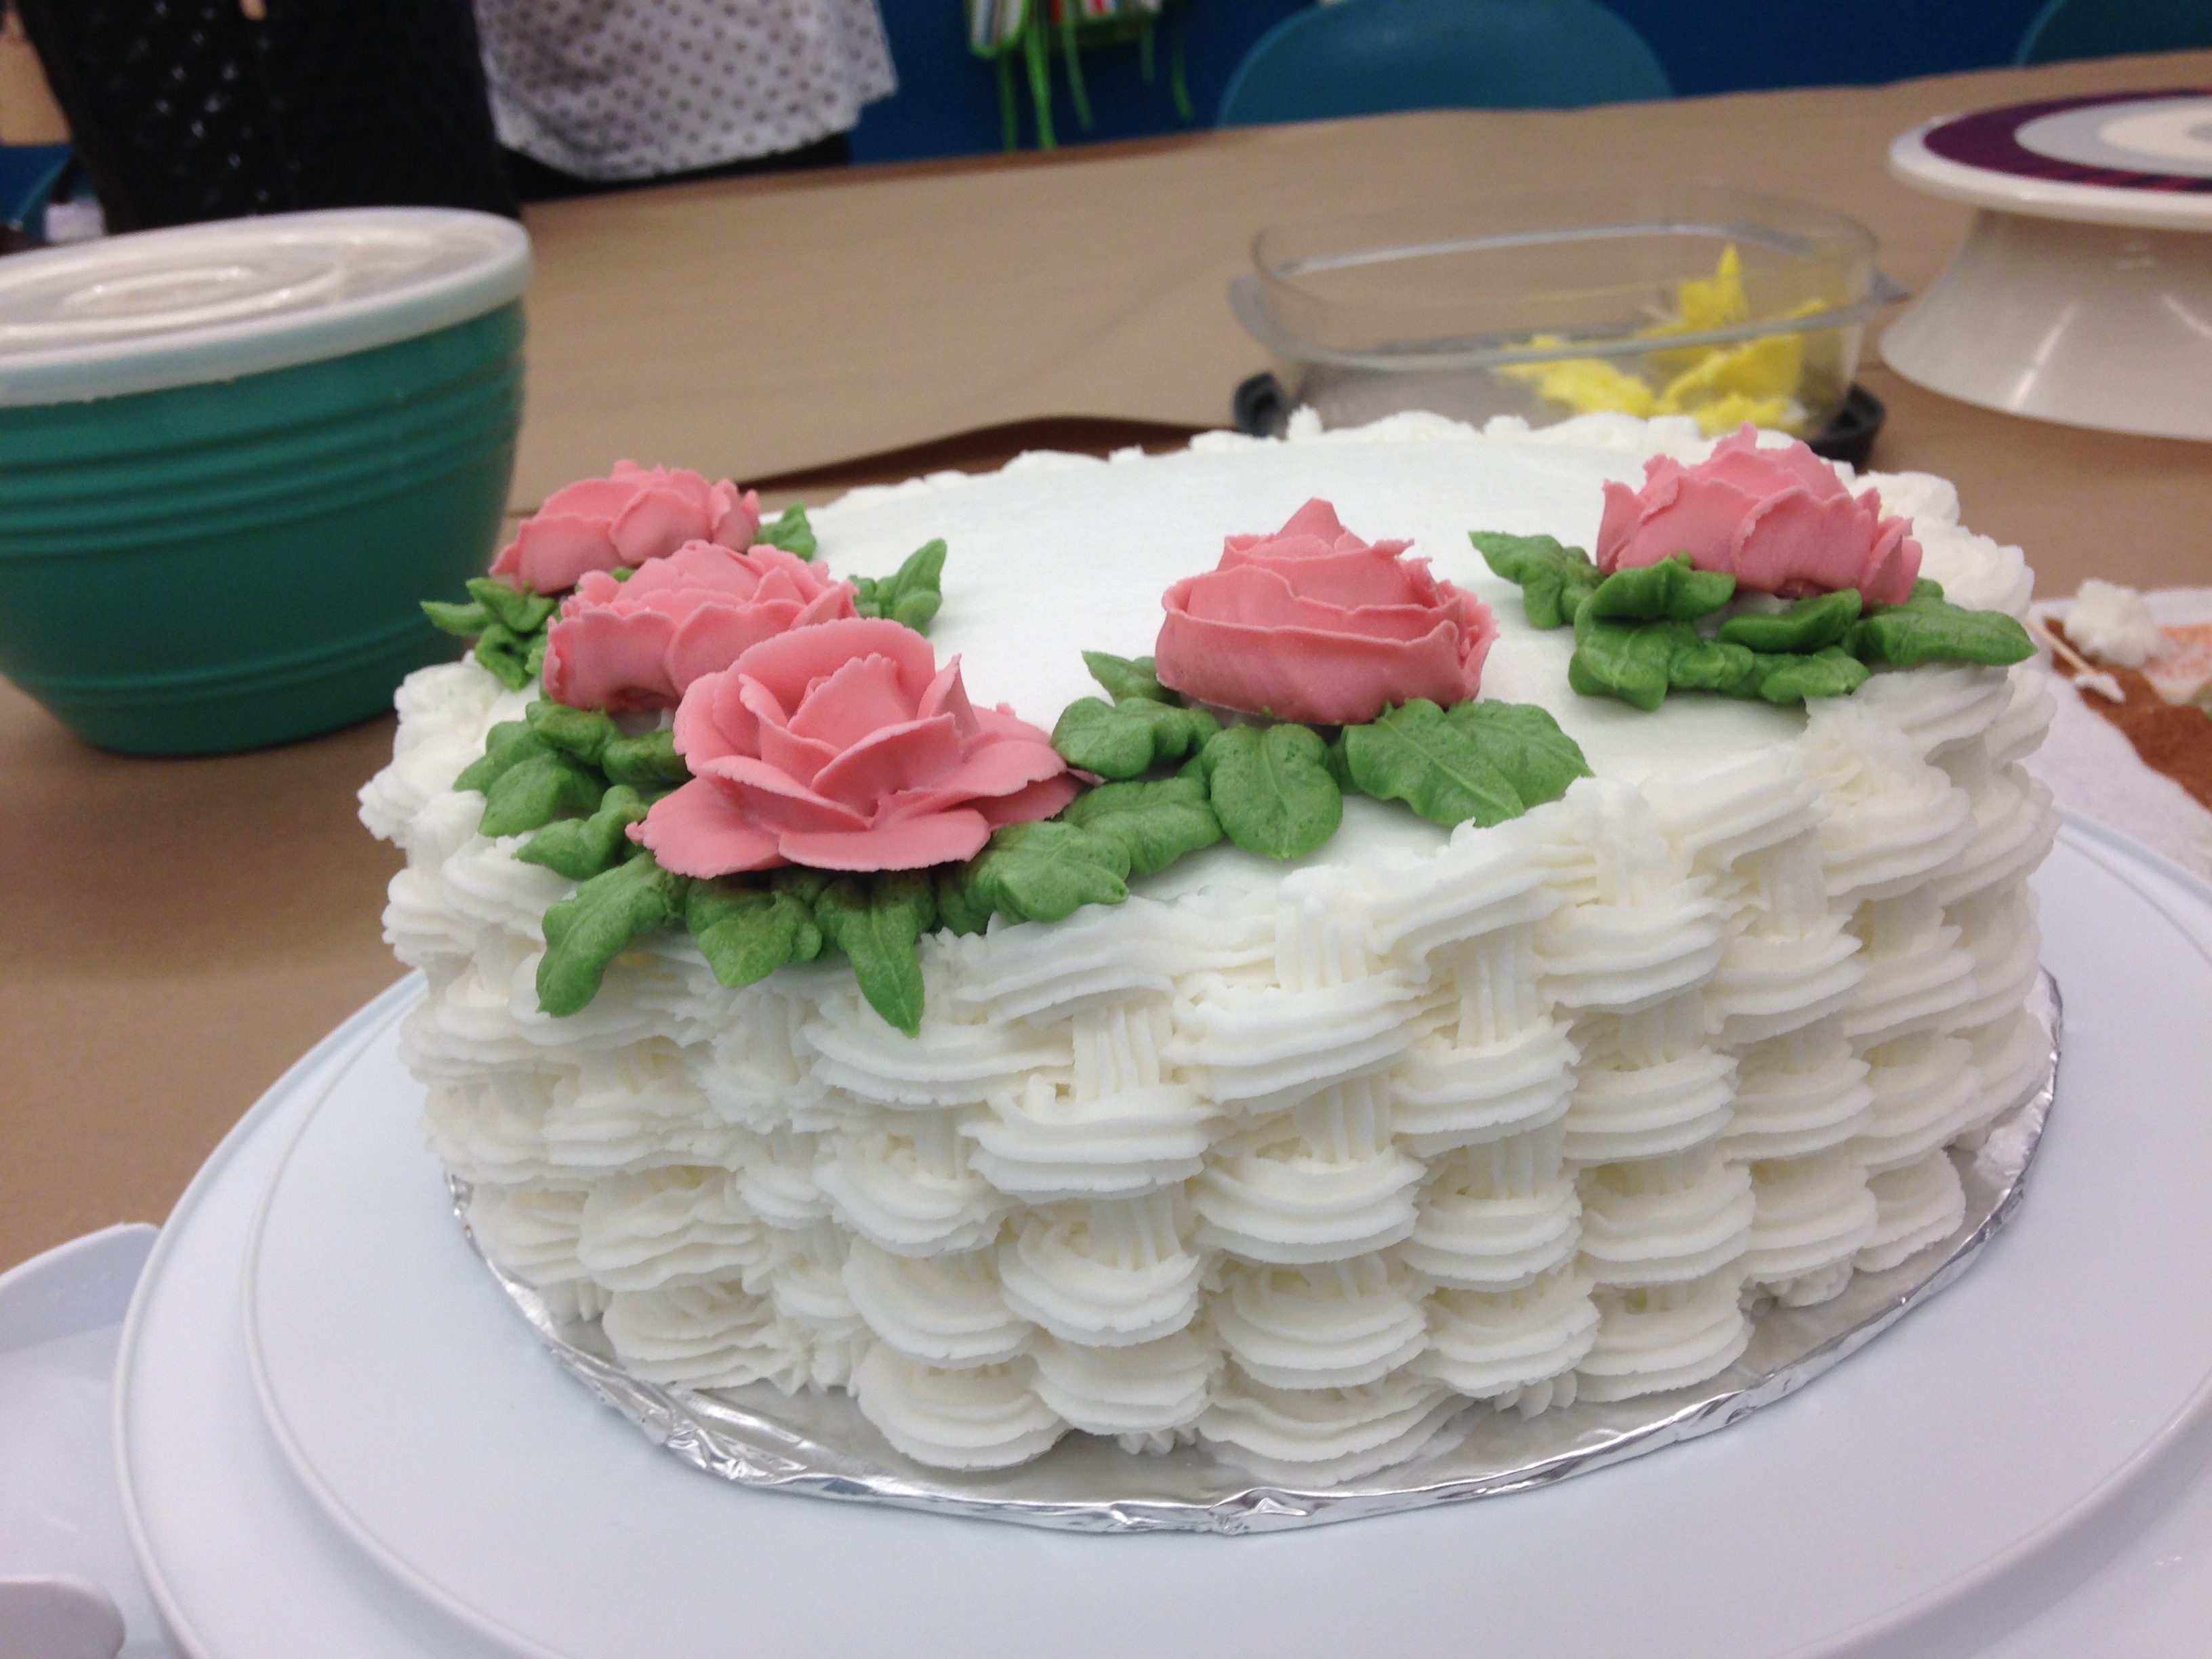
Tommy and I did eat this cake (as well as the roommates) and I have to say it is a LOT of frosting.. so next time I use this basketweave pattern, I will use less frosting underneath. It was still tasty! Next course starts next week! We begin to use fondant and gum paste to create flowers and frost cakes! I’m excited to see how fondant works!
-A
Hayl’s First Quilt, Step 2: Sashing and Borders
When I left off from my last post, I had six complete quilt blocks for Evee’s baby quilt:

The next step in completing the quilt top was to add sashing and borders. Quilt sashing is simply the term for borders around individual quilt blocks. Actually, when I first envisioned this quilt, I thought I would make it without any sashing, which is totally fine–it would have given the quilt more of a patchwork feel. But when I had completed my quilt blocks and laid them out like this, I immediately got the sense that I needed a contrasting fabric to really make the colors pop. Despite the bright colors in the fabrics I’d used, the quilt seemed too dark–so I wanted to get something lighter.
So back to Jo-Ann Fabrics I went, with a couple of the quilt blocks in tow to compare colors. I chose a white fabric with a print that had some coordinating colors, and also got a little bit of a print with the same bluey-teal and pink colors. I apparently failed to take any pictures of the completed quilt top before the quilt was assembled & quilted, but once all of the sashing was added, this is what it looked like:

First I decided on a width for the sashing (remember to add 1/2″ for both seam allowances). I cut strips of the white fabric: eight strips that were the same length as the length of the quilt blocks, and nine that were the same length as the width of the quilt blocks. (Of course, if your quilt blocks are actually squares, then these would all be the same length!) I also cut twelve squares of the corresponding fabric that were the same width as the sashing strips to go in all the corners & intersections.
I doubt that the order of assembly matters very much for a quilt this small, but Best Quilting Practices are to assemble the quilt in rows. This quilt only has two rows, so first I sewed the sashing between the quilt blocks in the rows (the seams are indicated by the black dashed lines in the picture below).

Then I made the three horizontal rows of sashing (sewing the seams indicated in yellow). Finally, I put it all together by sewing along the red lines.

Of course, Fluffy helped!
At this point, it’s pretty common to do a final border around the entire outside of the quilt top, but I decided not to.
The next step was to put together the quilt sandwich. I had purchased batting and some coordinating baby fleece for the back. When I put them together, the fleece I had for the backing was pretty much exactly the same dimensions as the quilt top. However, all of the quilting tutorials I looked at said that the back should have a few extra inches all around, to give a little leeway while quilting. After doing a little more research, I decided to use a pretty common trick to extend a quilt back (or simply to make the quilt back a little more interesting, especially if it’s a larger quilt when a seam is absolutely necessary due to the width fabric comes in). I cut the fleece in four sections, making one cut longways on the fleece, and the other cut perpendicular to that. Then I sewed some of the extra fabric from the front to add a few inches in each direction:

This picture was taken after the entire quilt was finished, but you get the idea.
I really like the effect that made!
Now with a back that was the appropriate size, I assembled the quilt sandwich and used safety pins to hold all three layers together. I started pinning in the middle of the quilt, and placed pins in the center of each quilt block and at regular intervals around the sashing. Later, when I was in the middle of doing the actual quilting, I added more safety pins around the outer edge, because I kept making the mistake of catching the back folded over underneath, and then it was a HUGE pain to rip out a seam of tiny quilting stitches to fix it! But I’m getting ahead of myself–I’ll talk about doing the actual machine quilting in my next, final post in this series.
Hayl’s First Quilt, Step 1: The Nine-Patch Square

About a week after Erin informed me that she was pregnant, I was in Jo-Ann Fabrics to pick up something-or-other. And, not being able to contain my excitement, I made sure I browsed through the baby fabrics while I was there.
That’s when I spotted it. Adorable, wide-eyed baby owls on a brown background. I hesitated for only about ten seconds–there sure was a lot of bright pink in those owls, and it was way too soon to know whether the baby was a boy or a girl. But I definitely don’t believe that pink is a “girl color”–colors are for everyone, right? I picked out two coordinating fabrics–a stripey one with browns and pinks and oranges (and blue and green…)–all the same colors as the owl print–and a bluey-teal with little brown polka dots.
(And I know there are things like logic and confirmation bias and all that, and I also know that I really don’t buy into the whole blue/pink boy/girl dichotomy, but on two other occasions, I’ve purchased blue yarn to crochet baby blankets of babies who turned out to be boys, and now some small part of me that ignores all of that knowledge and also common sense is convinced that I have a craft-material-purchasing prediction-of-babies’-sexes superpower.)
Ahem. Anyway, I fully intended to make a baby quilt by the time Evee was born. Instead, I worked it on and off over a year and a half, and gave it to her on her first birthday. Sometimes, that’s the way it goes with craft projects. (Who am I kidding–sometimes?? Try “most times.”) Which worked out great, actually, because Aunt Ash gave Evee a turtle quilt for her baby shower, and you’ve got to spread out the adorable-animal-quilts-handmade-by-aunties over as long of a time period as possible, because the implosion caused by an overload of too much adorableness all at one time can seriously rupture the space-time continuum.
Because of how much Laura Ingalls Wilder I read as a child, I always knew that the first quilt I made would be made up of nine-patch quilt blocks. This is a super-easy quilt block that’s perfect a beginner, especially because it can be done without any pattern and with only the most basic tools: you can get by with just a ruler (or small cutting mat) and fabric scissors, if you don’t have anything fancier. (A cutting mat and rotary cutter make the job MUCH easier, but I still get by without!) There are many tutorials out there for how to make a nine-patch quilt block, but all you really have to do is sew nine squares together to make one larger square. However, I used the strip method (which my mom taught me YEARS ago, on my first aborted attempt at making “my first quilt” as a teenager).
What I did first was for each pair of quilt blocks, I took two of the fabrics and cut three strips of each of them like this:

The added measurements are for seam allowances. I’ve described the measurements very precisely here, but I am actually pretty sure that I was quite a bit off with one of them when I cut my strips. You’ll see the effect of that imprecision at that end.
Then I took the 6 strips and sewed them into two squares like this:
 Then you simply cut both of those squares in thirds, perpendicular to the seams, like the dashed lines show below:
 Now you once more have six strips, but each strip has three squares. If you then exchange the middle strips from each square, and sew the strips together once more, you’ve got two perfect nine-patch squares:
 Et voilà!
I did this three times, for each combination of the three fabrics. Here are the six nine-patch squares I finished with:
Not shown: Fluffy “helping” by sitting on a quilt block to test its comfy factor. In fact, he sat on fabric anytime I laid it out–from when I first started cutting to the very end. He’s just helpful like that.
As you can see, my “squares” came out a little more rectangular than I had intended, but I actually rather liked that. This is the result of that imprecise measurement I mentioned. I didn’t write down the dimensions I used to cut my strips, but in retrospect, I think I made a mistake in calculating the seam allowances for the long side of the strip, and cut them a little bit longer than I meant to. Thankfully, the nine-patch quilt block is quite forgiving, and therefore very flexible–you can play with different arrangements of fabric, or cutting at different places when you cut up the blocks before exchanging strips (just so long as you exchange strips of equal width between the two blocks). The basic technique is so simple that there are endless ways to play with variations on it. In fact, the nine-patch square serves as a backbone for many more complicated quilt blocks.
As Erin said before, “most of the process [of quilting] is spending long hours cutting, ironing, pinning and stitching,” which I think sums it up quite nicely. The main skill required here is keeping your seam allowances consistent so that the corners of the little squares line up. But even when they’re this simple, there’s something very satisfying about the completion of each quilt block.
Now that I’ve shown how I made the quilt blocks, the next post will be about adding sashing and borders to finish piecing together the quilt top, so stay tuned for even more “cutting, ironing, pinning, and stitching”!
Royal Icing Flowers Pt. 2
Lesson three continued explaining how to make royal icing flowers. To start, we completed the rose, using the base we learned in the last class. After the base is complete, the petals go on in three layers; three petals, five petals, and seven petals; using tip #104. I have to practice some more because my roses still look as if they’re not totally open, but my teacher assures me that it comes with practice.

The next flower we did was the daffodil, which was really cool and kinda hard. Using the petal tip (#104), we put 6 petals on the flower nail and pinched the tips into points. Then we created the cup with a spiral motion using tip #3. The hardest part was the squiggle on the top of the cup because it uses tip#1, which is the tiniest hole to try and squeeze royal frosting out. My hands shook like crazy because of the pressure. But the overall effect was worth it!


The last flower we learned was the lily. It uses a special cup that looks like a goblet. You put foil in the cup and lightly grease it. The petals were made with the big leaf tip #366. The first three petals were made in a “Y” shape and then the last three filled in the gaps. To finish, we put in pre-made stamen in the center. (Note: the stamen are not edible!)
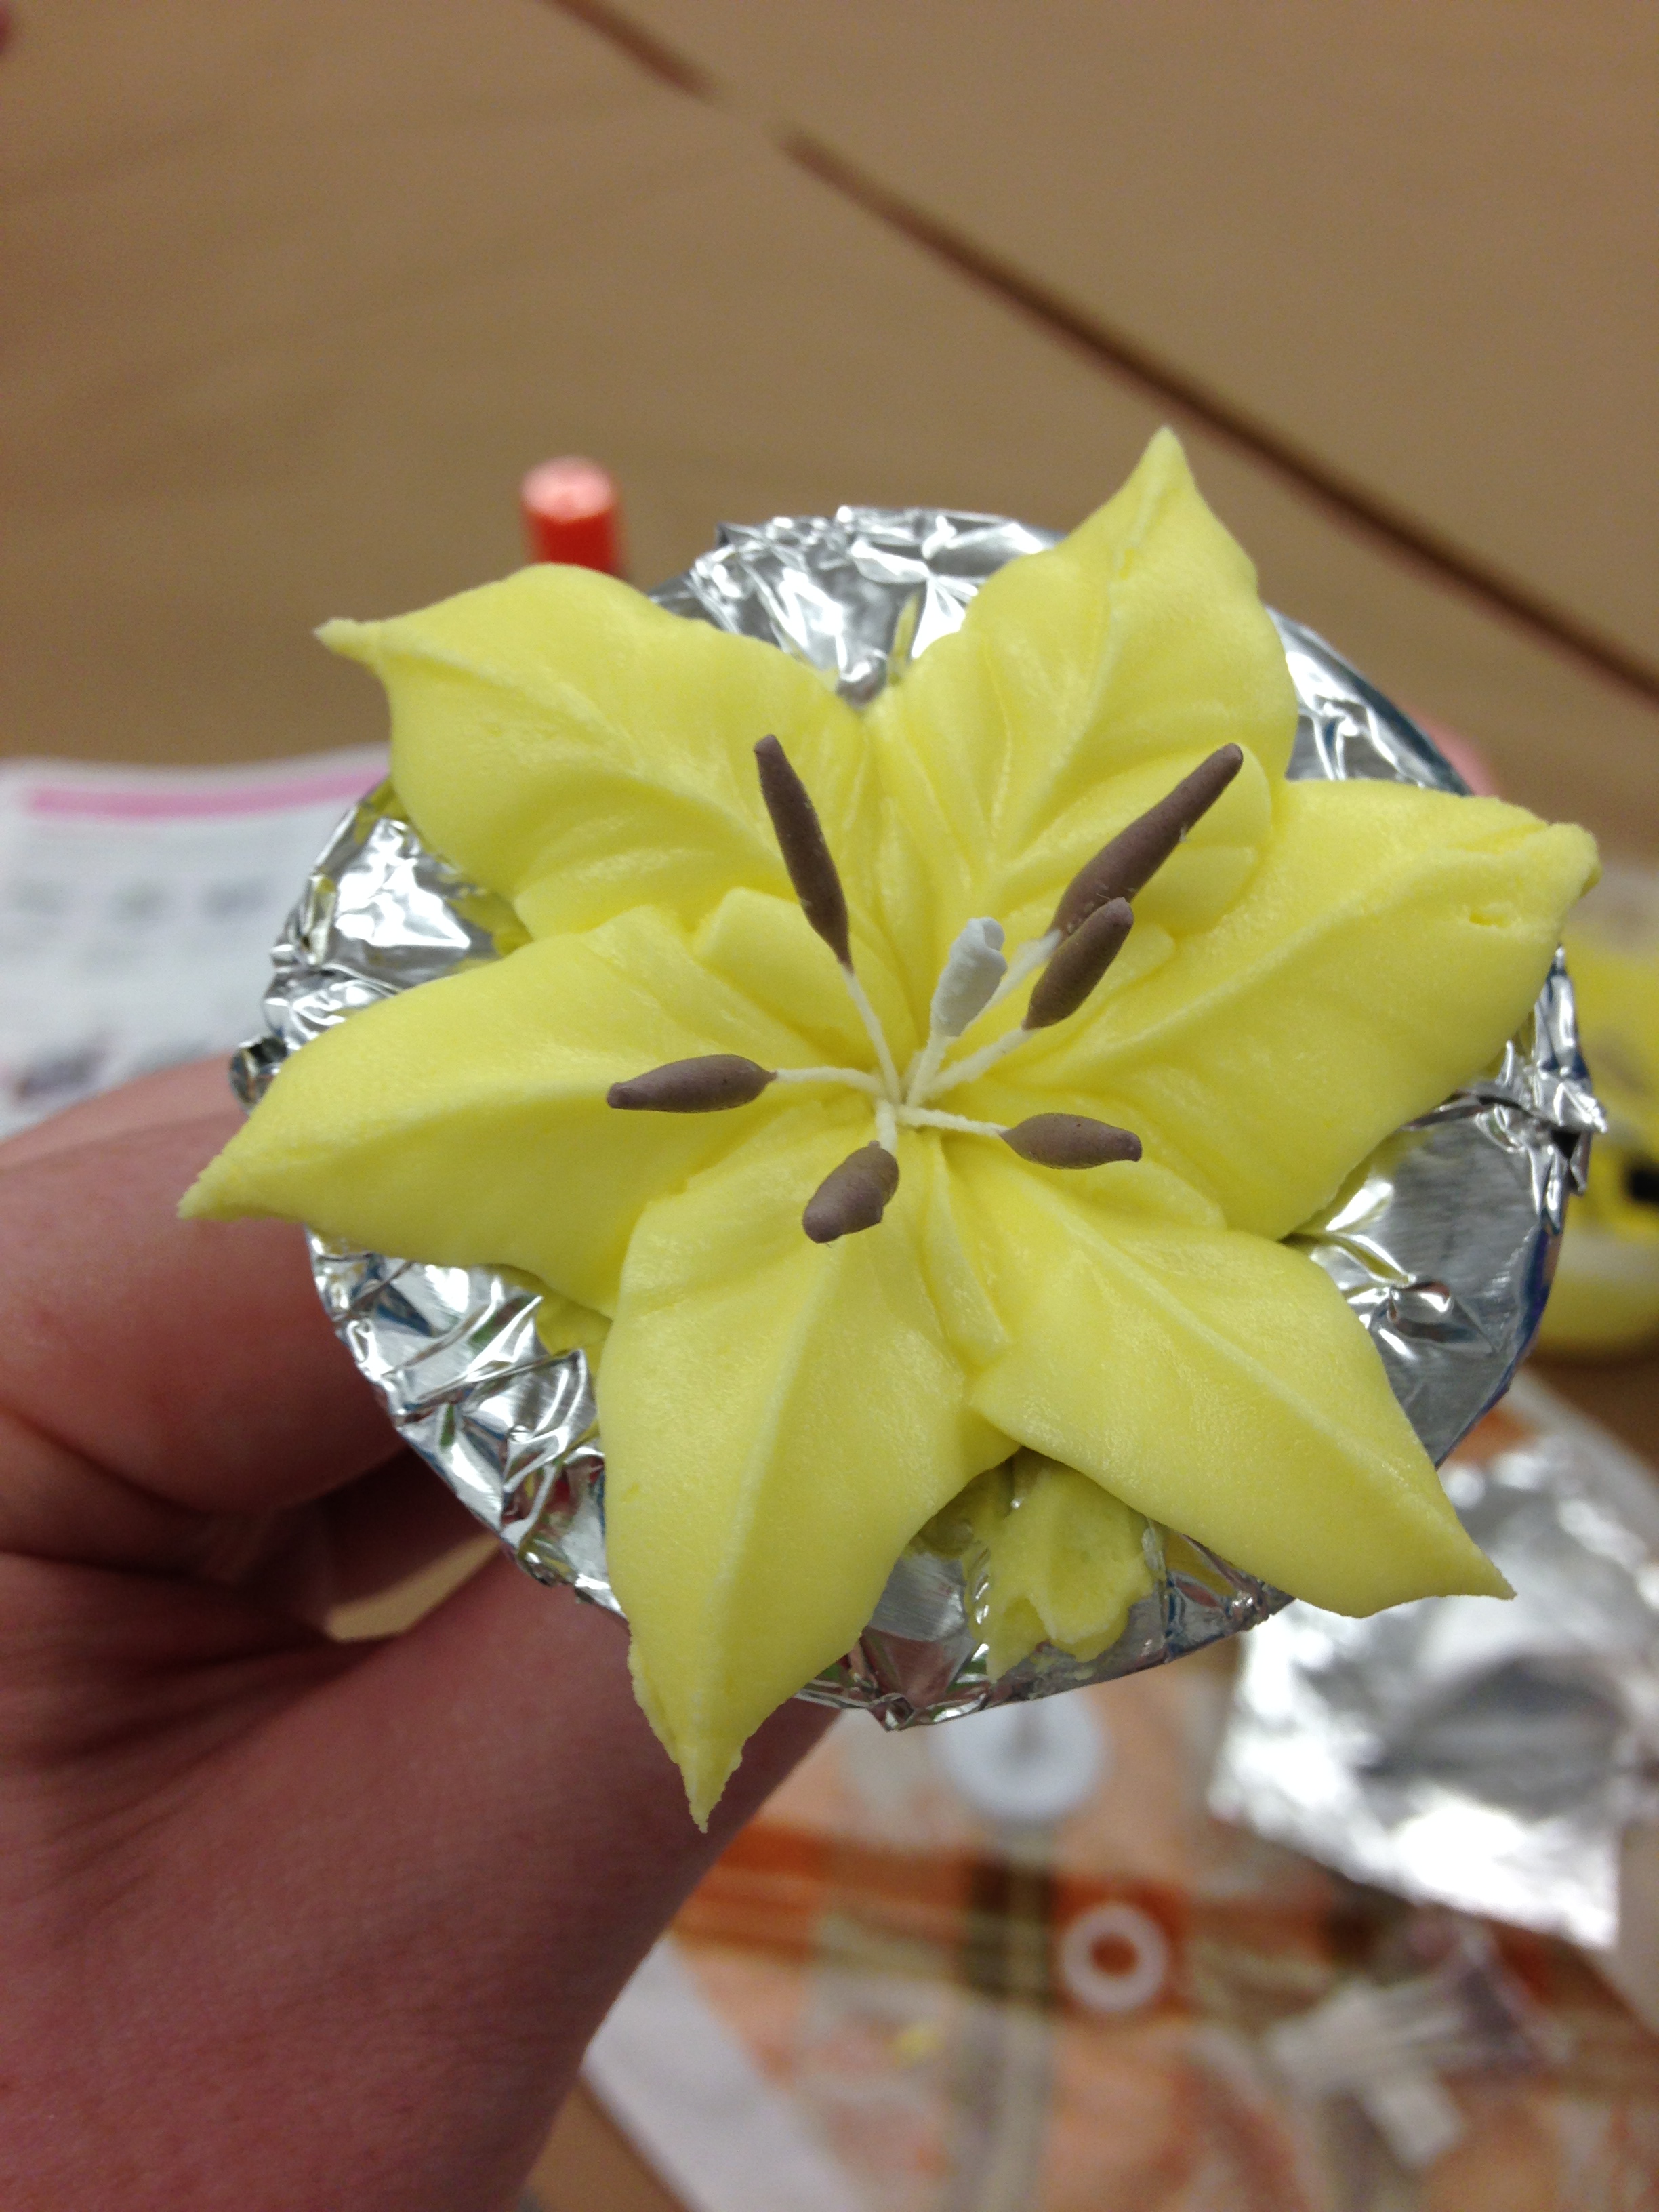
Thankfully, this class was the end of royal icing! I ended up breaking a few flowers when trying to take off the paper it was on, which I learned was due to the flower not being totally dry. Making flowers for cakes requires a lot of patience and can be done way ahead of time to be sure they are dry before putting them on a cake. Next week is the last class and I get to decorate a cake! 🙂
-A
Simple Frosting Flowers
Class 2 was a lot of rebuilding on old techniques. To start, the frosting this time was not buttercream… but royal icing. It’s basically just powdered sugar and water. But man oh man, is it just awful to mix! It turns into this goo that sticks to everything! If there is a shine to the icing, I had to add more sugar. I had to add a drop of water at a time to soften it.. one drop too many was enough to ruin the batch! It reminded me a lot of the solid-liquid mixture I made in 6th grade with flour. To add more difficulty to mixing, we needed to create colors for the flowers. I kept it simple with pink.
The first flower we did was a recap of the rose base. Using tip #12 and #104, we created the ball base and the wrap around top.

We aren’t learning the other petals until next class.. so we moved on to the primrose and apple blossoms. These are similar flowers, just using different tips. The primrose uses tip #104 and the apple blossom uses tip #101, which is smaller. The flower nail template was changed to a five petaled flower. The primrose petals looked a bit like a heart when creating them. With the wide end in the center, you squeeze and pull up and down in a M to make a heart. The apple blossom had 5 small short petals that formed more of an arch. At the end of both, I was supposed to put yellow dots in the middle, which I didn’t have time for. (We had one more flower to cover!) I let the flowers dry on a wavy board, which makes the flowers bend.

By this point in the class, my arms were hurting from squeezing out the tough icing. The last flower we learned was the rosebud. We used the practice board in class, but I’m sure you use wax paper to make it easier to transfer to a cake. Again we used tip #104 and made a petal. The bud part came in when we curled the top petal to create the bud look. I didn’t make it very far before my bag popped from the pressure!

Next week we are covering the rest of the rose and more! Only two weeks left until Class 2 is over!
-A
